

Curious Beginner's Guide to MCPs
An extremely practical guide on MCPs with step-by-step hands on instructions

Dear subscribers,
Today, I want to share a very practical guide on MCPs (model context protocols).
“MCP” sounds intimidating, but is surprisingly intuitive once you try it yourself.
So let’s walk through:
What is MCP?
Step by step walkthrough:
Let AI talk to your local files
Let AI use your browser
My favorite MCP servers and where to find more

What is MCP?
“Model context protocol” is a set of lightweight rules that standardize how AI models connect to different data sources and apps.
Before MCP, connecting AI to tools required custom code for each integration. MCP solves this by by requiring all tools to use a common message format. For example, an AI can call both a calendar app and a weather app using the same request structure.
To make this practical, let’s use Blender MCP as an example. This MCP connects an AI tool like Claude Desktop or Cursor to Blender (a free 3D modeling tool) so that you can build 3D models simply by prompting “Create a 3D cabin.”

Here’s how it works:
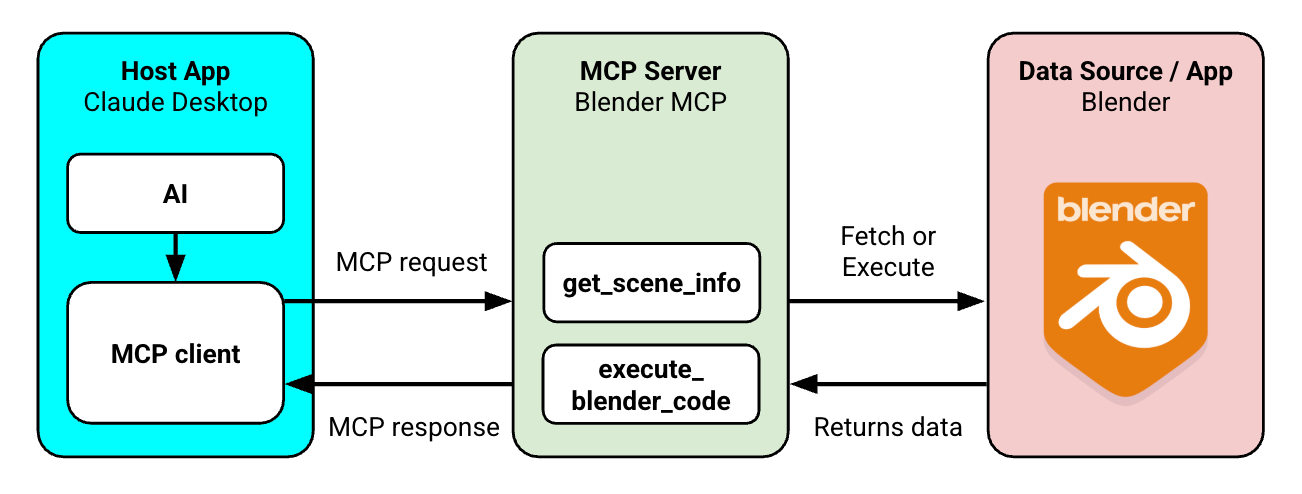
Host app: You type a prompt in Claude Desktop (e.g., “create a 3D cabin”).
MCP client: This is a bit of code inside Claude Desktop. It checks which MCP servers are available (e.g., Blender MCP) and what tools they offer. It then translates your AI prompt into a JSON with instructions on what tools to use before sending it to the Blender MCP server.
MCP server: This is a lightweight app that receives the MCP client’s request and translates it into Blender scripts. For the cabin request, the server might use the following tools:
“get_scene_info” to see what 3D models are already in the file.
“search_polyhaven_assets” to look for a pre-built 3D cabin.
If none found, “execute_blender_code” to script a cube (walls), pyramid (roof), and rectangle (door) to build the 3D cabin.
Data source or app: Blender runs the scripts to build the cabin and returns data.
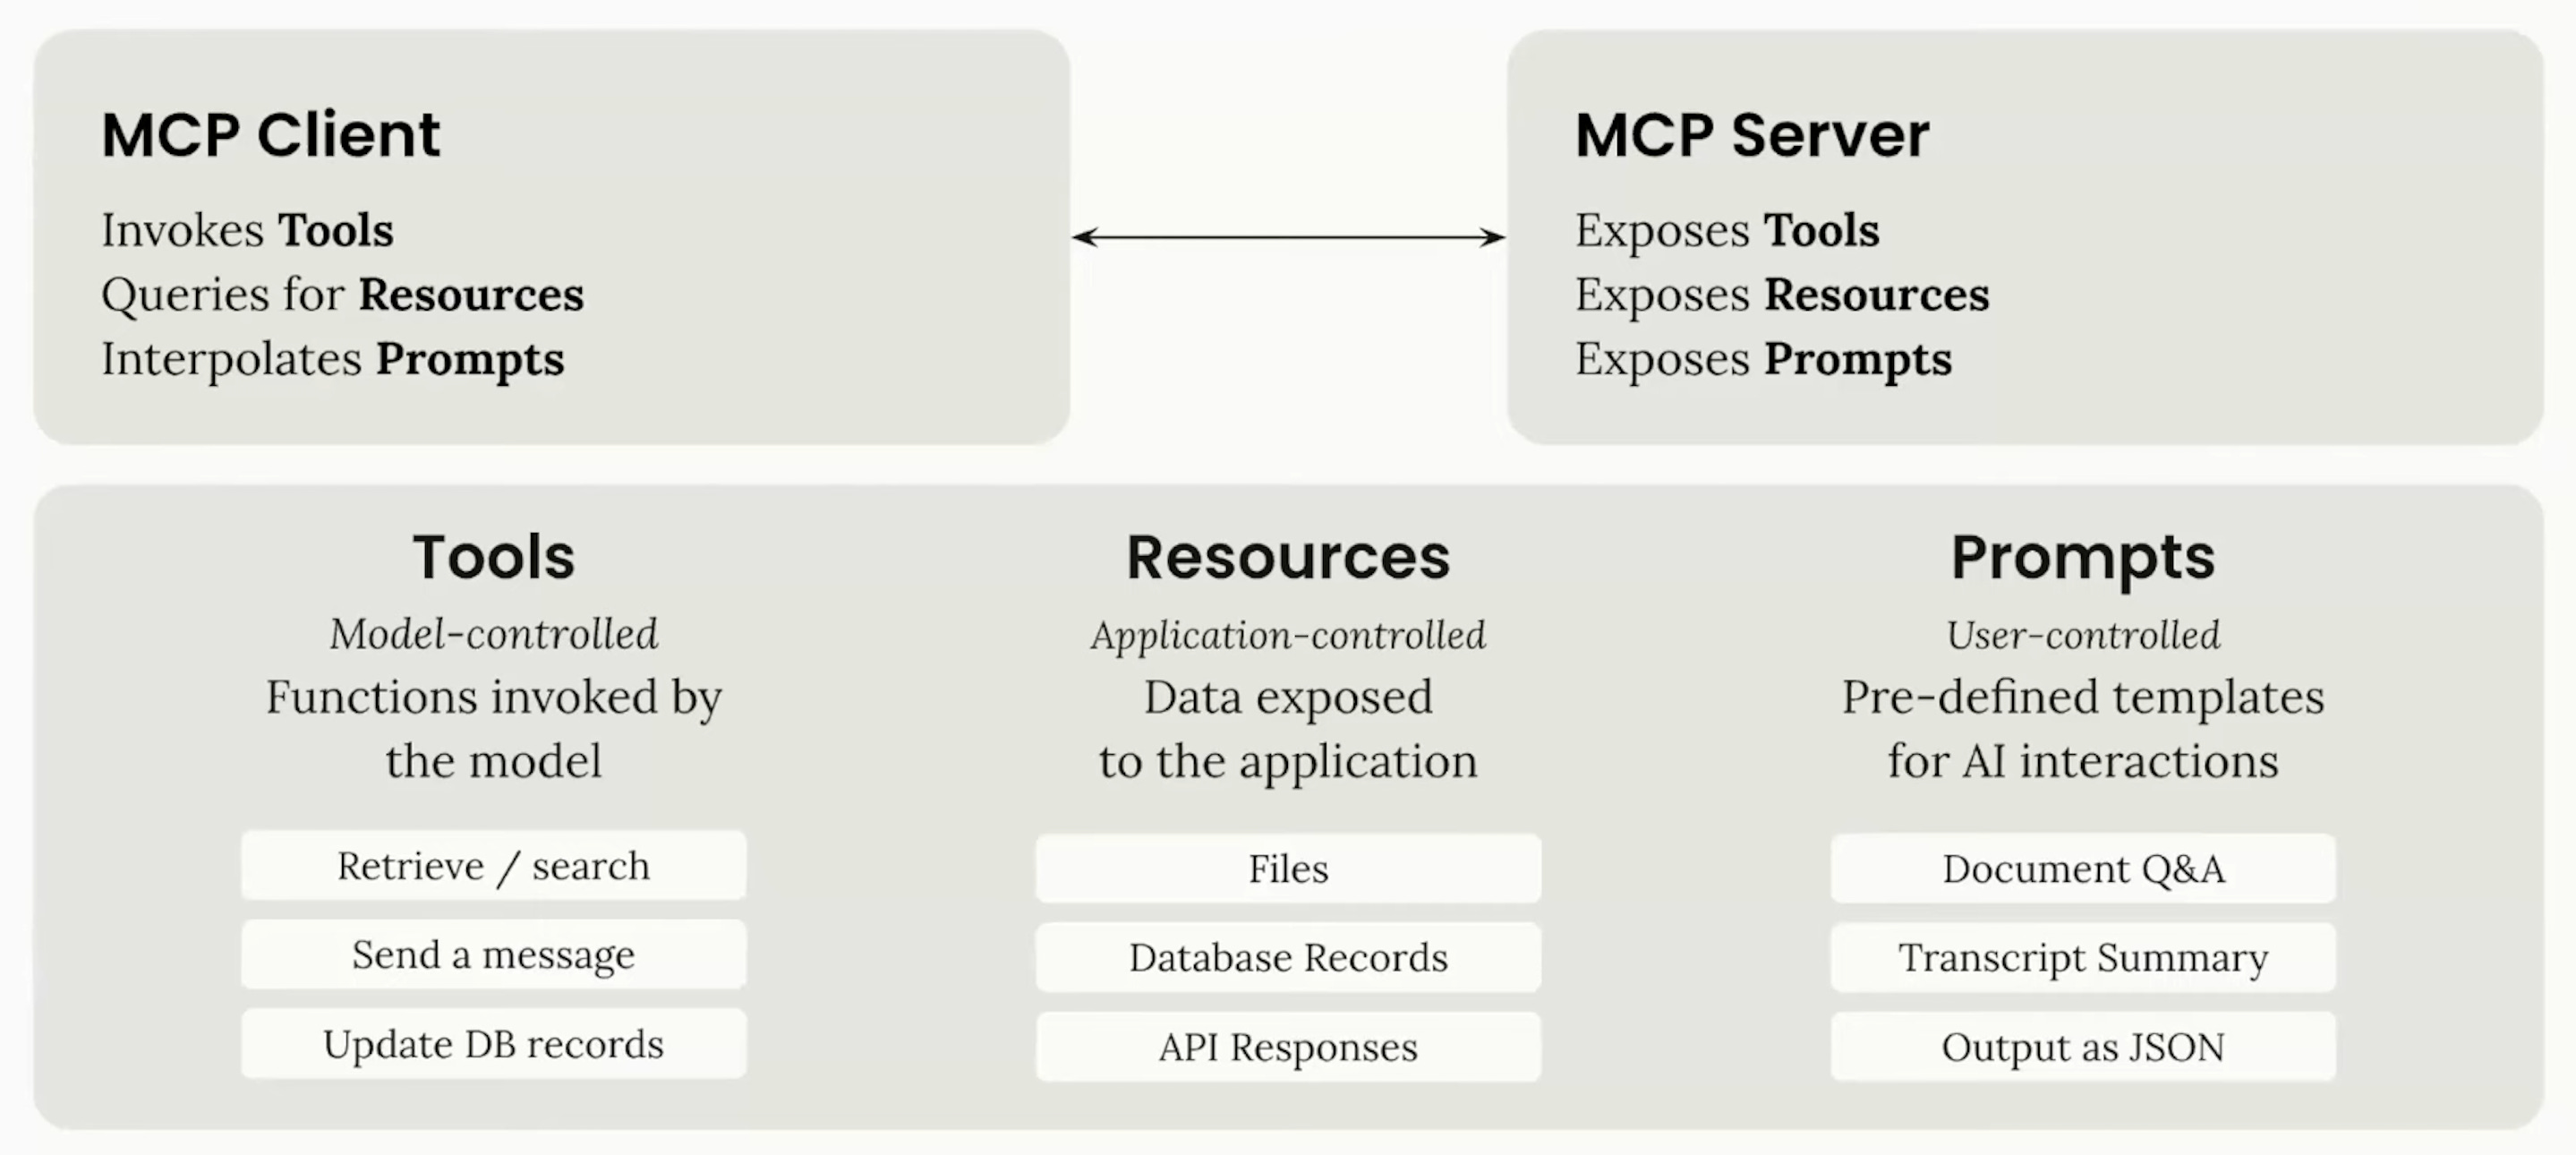
When Claude and Blender talk through the MCP, they can exchange three things:
Tools. Concrete actions the AI can trigger. e.g., “get_scene_info” checks what objects exist in the scene and “execute_blender_code” creates 3D objects.
Resources. Files the AI can fetch or modify. e.g., a “wood_planks.jpg” texture image that you uploaded to Blender.
Prompts. A built-in prompt like
asset_creation_strategywhich tells AI how to pick tools (e.g., look for a pre-built 3D cabin before scripting shapes).
So basically, the Blender MCP client turns AI into a hands-on assistant that can inspect your 3D scene, pull in assets, and generate fresh geometry all using prompts.
Step by step walkthroughs: Let AI talk to your local files and use your browser
Now let’s walk through two practical MCP setups that should take less than 30 min:
Let AI talk to your local files
Let AI use your browser (e.g., to debug vibe coding errors with Cursor)
Don’t get intimidated by this — you don’t need to write code yourself, some simple copying and pasting will do it. Let’s walk through each step by step below.
1. Let AI talk to your local files

If you’re like me, your Downloads folder is probably filled with junk that’s a hassle to clean up. With the Filesystem MCP, you can just give AI tasks like:
“Find duplicate files in my download folder”
“Move all the images in downloads to a new folder called Images”
Here’s a step by step guide to set this up: