

Full Tutorial: Build an AI Headshot App in 15 Minutes (with Google Nano Banana)
Transform any photo into a professional headshot in 3 different styles (AI prompts included)

Dear subscribers,
Today, I want to show you how to build an app that turns your photos into professional headshots using Google’s nano banana image model.
This is a great app to build if you’re new to AI coding because it’s just really fun to create professional headshots for your family and friends.
I’ve made this tutorial 100% free and included all my AI prompts below to make this as simple for you as possible. Watch now:
Timestamps:
(00:00) An overview of our AI headshot app
(00:46) Step 1: Work with AI to draft the spec
(04:00) Step 2: Building the UI and scaffolding
(05:55) Step 3: Creating 3 prompts for headshot styles
(09:10) Step 4: Hooking up Google’s Nano Banana API
(11:49) Step 5: Fixing bugs and issues
(12:35) Testing the complete app end to end
Watch now on YouTube or read the written guide below. P.S. I wake up at 6 am to make these tutorials so subscribe to my YouTube if you enjoy them. 🙏
Thanks to Linear for sponsoring this newsletter!

Teams at the fastest growing companies in the world (including OpenAI, Ramp, Cursor, and more) are using Linear to collaborate with AI agents that can:
Analyze customer feedback from multiple sources
Auto-triage tickets and assign owners
Build complete features from scratch
It’s the best tool that I’ve tried for planning and building products. See for yourself what the difference is by trying Linear Business for 6 months for free.
What we’ll build: A professional headshot app

Let’s build an app using Google’s nano banana API where you can:
Upload a selfie
Select from 3 professional headshot styles (corporate, creative, executive)
Get a polished headshot to download
1. Work with AI to draft the spec
Start by pasting this prompt into your AI coding tool (I use Cursor with Claude Code):
Create a spec.md for a professional headshot AI app where I can upload a photo, select from one of three styles (corporate classic, creative professional, executive portrait), and then get a professional headshot that I can directly compare to my original photo.

Include the requirements, tech stack, and 2 milestones. First milestone is to set up the UI and 2nd is to add Google’s nano banana image to image API: https://ai.google.dev/gemini-api/docs/image-generation.

Use React for frontend and Express for backend.
When getting AI to write the spec, I like to ask it to include:
Requirements, tech stack, and milestones.
Instructions to build the UI in the first milestone so I can see the app update live.
Links to relevant documentation (e.g., Google’s nano banana API docs).
Once AI drafts the spec, make sure to review and simplify it. AI often wants to build more than you ask for which can lead to problems down the line.
2. Build the UI first
Now let’s ask AI to “Build milestone 1 and run localhost. Use TailwindCSS 3.”
Tip: I asked AI to use “Tailwind 3” (an older frontend react framework) because it’s bad at understanding new frameworks (Tailwind 4 just shipped this year).
If you’re run into Tailwind issues, don’t give up. Paste the error messages that you see in the browser for AI to fix and eventually, you should get a UI where you can upload a photo and select a style:
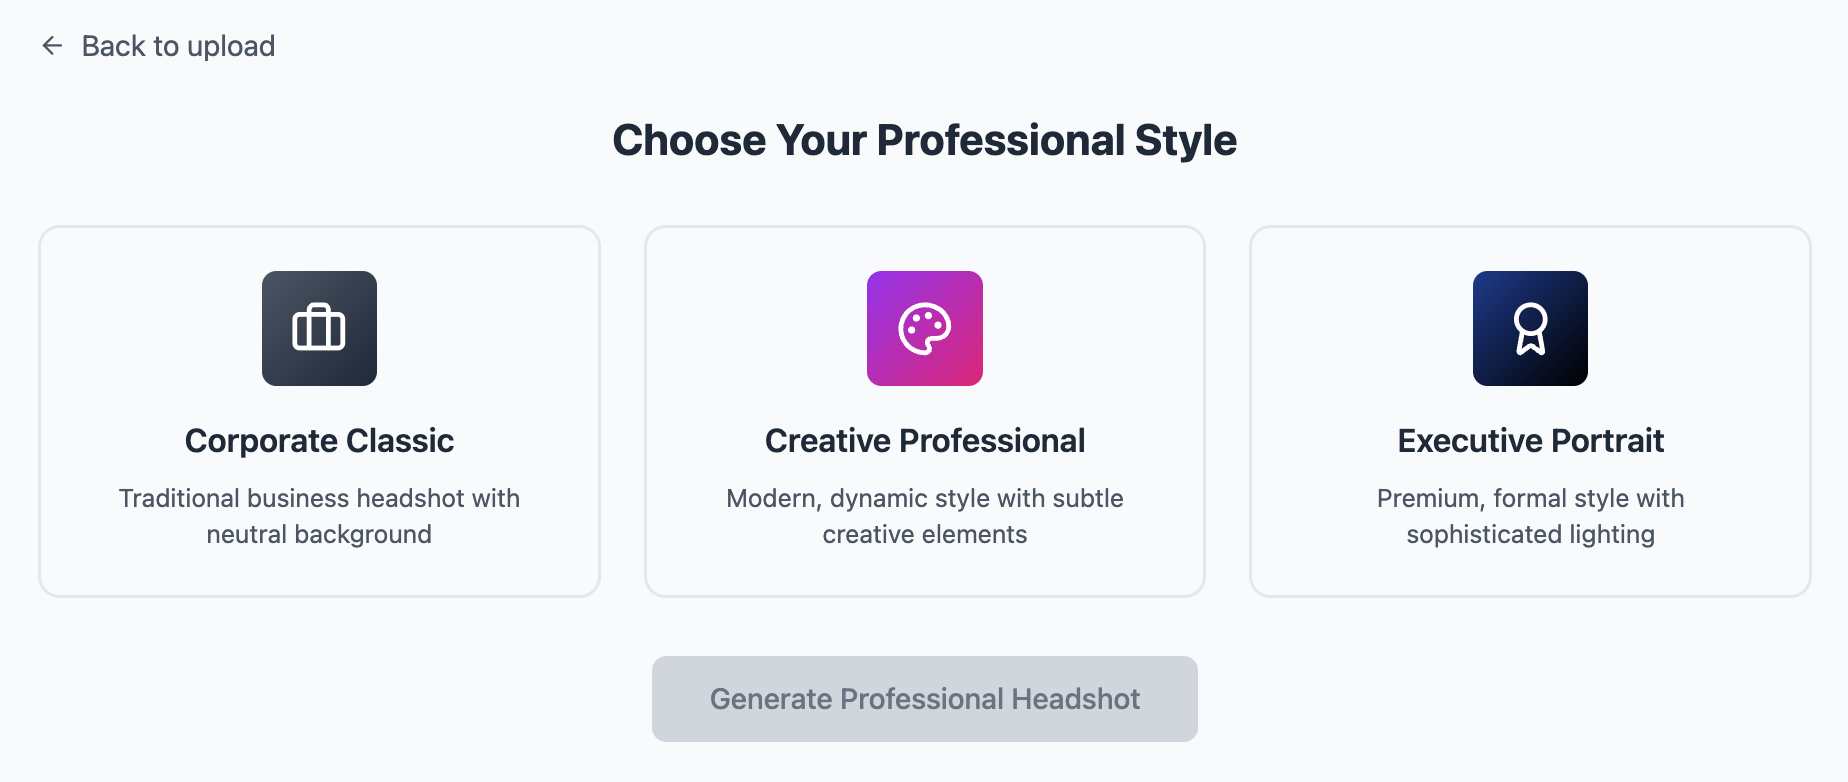
The actual image generation won’t work because we haven’t integrated the API yet.
3. Create 3 prompts for headshot styles
Now that we have the UI set up, let’s ask AI to create a prompt.md file with 3 styles:
Create a prompt.md file with prompts for 3 styles:

1. Corporate: Standard LinkedIn-style headshot with neutral background.
2. Creative: Close-up with soft bokeh background and natural lighting.
3. Editorial: Dramatic black and white portrait with artistic lighting.
For your convenience, I’ve included prompts for all three styles below for you to easily copy and paste into your prompt.md file:
Corporate classic
Transform this photo into a polished profile shot maintaining the exact facial features and identity. Subject framed chest-up with headroom, eyes looking directly at camera while body angles slightly away. White t-shirt with black leather jacket, open smile. Neutral studio background. High-angle perspective with soft, diffused lighting creating gentle catchlights. 85mm lens aesthetic with shallow depth of field - sharp focus on eyes, soft bokeh background. Natural skin texture with visible hair detail. Bright, airy feel. Make subject look great and accurate to their original appearance.Creative professional
Transform this photo into a close-up portrait with shallow depth of field creating soft bokeh background. Warm, natural lighting highlighting subject’s features. Casual attire and genuine, engaging smile. Subject fills more of the frame. Background hints at creative workspace or outdoor setting with beautiful blur. Preserve natural skin texture and authentic features. Modern, approachable creative professional aesthetic. Make subject look great and accurate to their original appearance.Editorial portrait
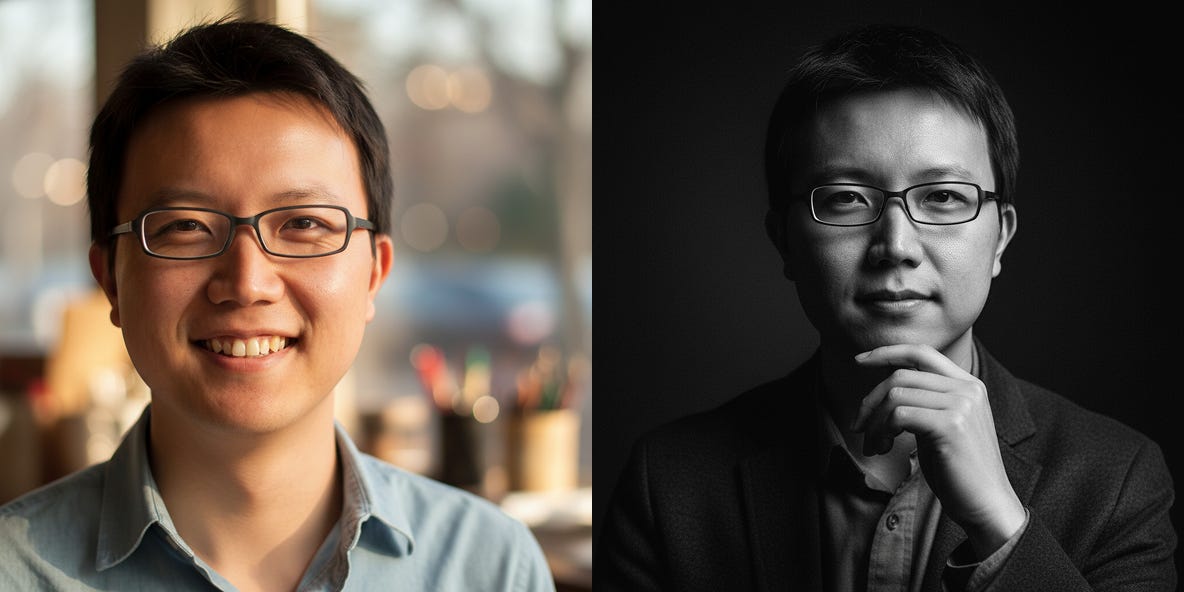
Transform this photo into a dramatic black and white portrait in editorial style. Preserve subject’s authentic features and character. Apply these specifications: monochromatic treatment with rich grayscale tones, deep charcoal or black background with subtle gradation, dramatic side lighting creating strong shadows and highlights on face (Rembrandt or split lighting), preserve all natural skin texture and detail - no smoothing, sharp focus capturing fine details in eyes and facial features, relaxed and contemplative expression - not smiling, casual professional attire (dark textured jacket, no tie), hand gesture near chest or face for dynamic composition, high contrast with deep blacks and bright highlights, cinematic film grain for texture. Maintain editorial photography aesthetic - artistic but professional. Make subject look great and accurate to their original appearance.Tip: To try another style, just paste a headshot that you like into AI and ask it to “Create an AI prompt to recreate this style.”
4. Connect Google’s nano banana API
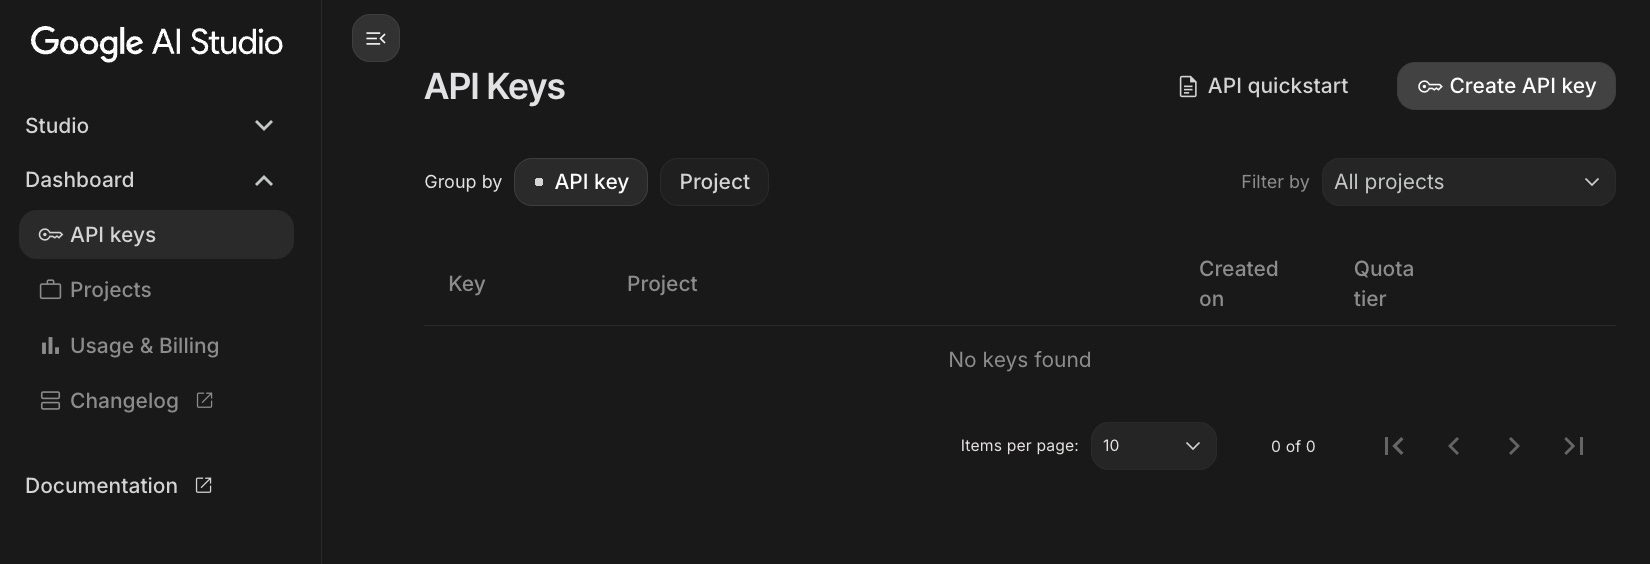
Let’s build milestone 2 next. First, let’s get a Gemini API key by going to Google AI Studio → Get API key → Create API key:
Next, ask AI to build milestone 2 and paste the API key into the prompt:
Build milestone 2. Use this API key: [YOUR_KEY]
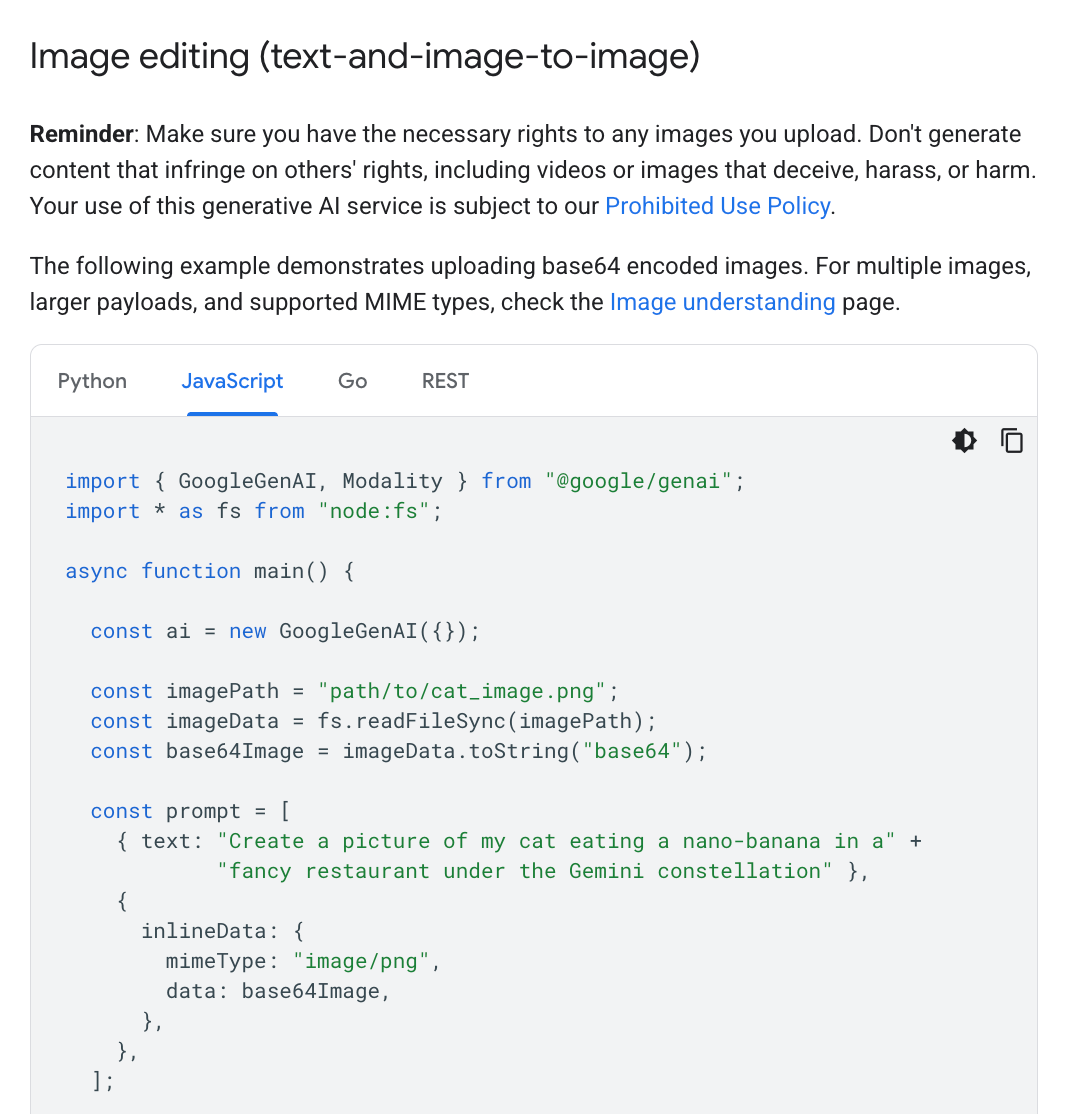
Remember to follow the instructions in the docs to build image-to-image: https://ai.google.dev/gemini-api/docs/image-generationIf you want to give more context to AI, you can also just paste in this entire section of the Google’s docs as part of your prompt:
5. Fix any bugs or issues
Here are some errors that you might run into while building this app:
Image generation is random. AI might be using the wrong Gemini model. Ask it to use “gemini-2.5-flash-image-preview.” If it says that Gemini can’t do image-to-image generation, tell it that it’s wrong and refer it to the docs again.
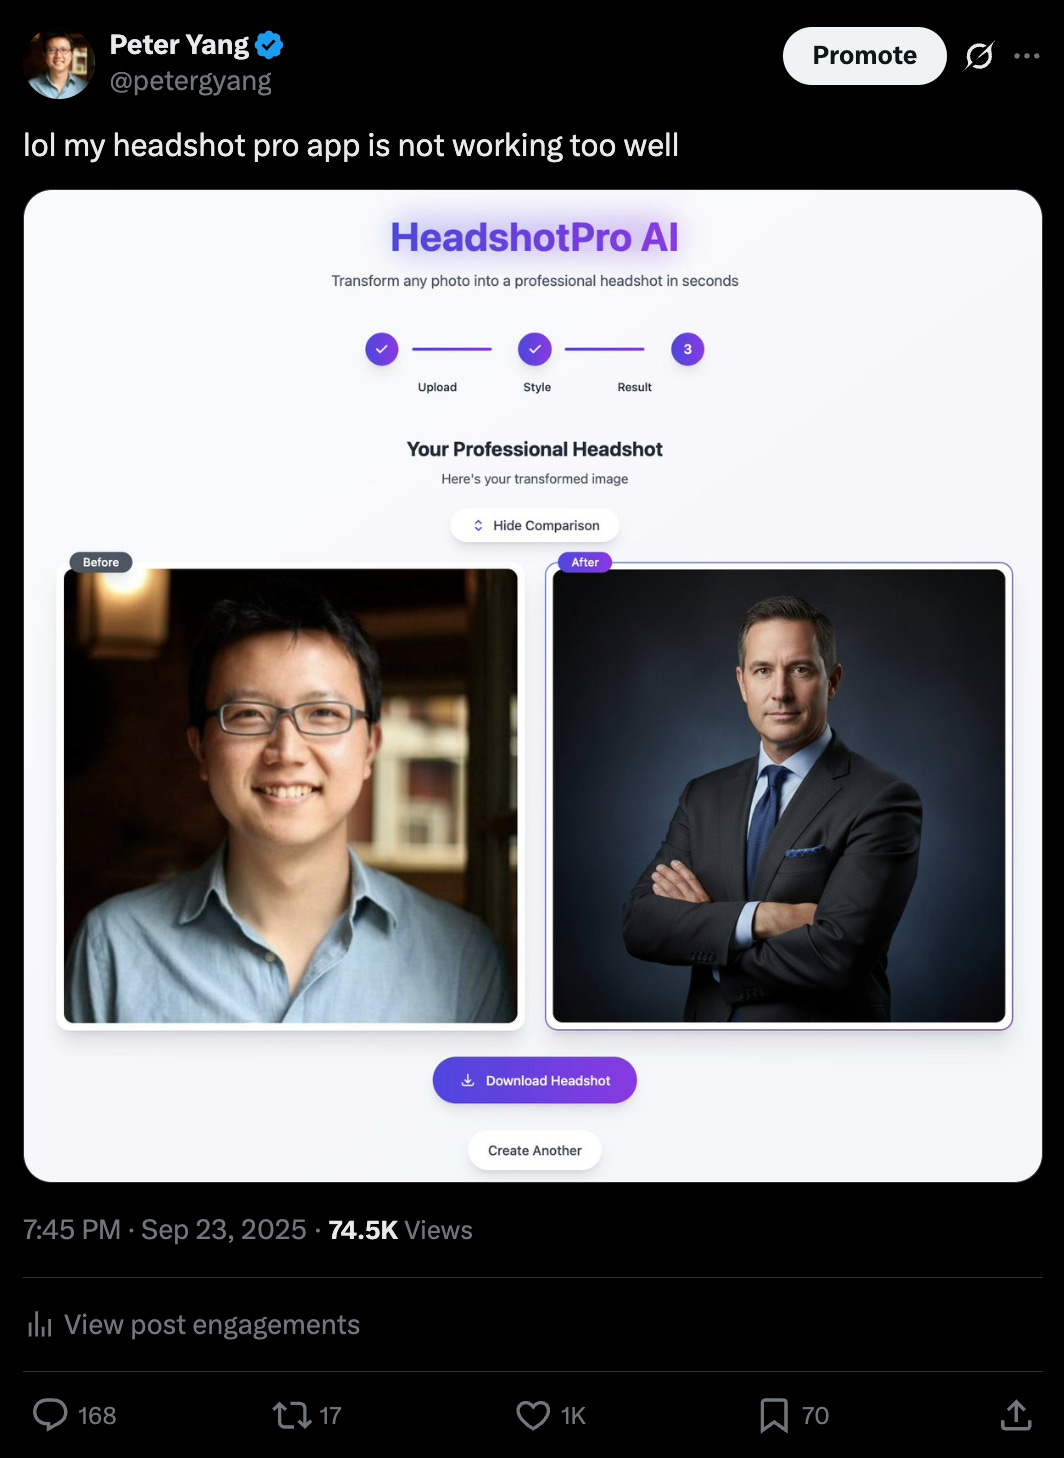
The UI looks bad. Try pasting a screenshot of my UI in the “What we’ll build” section up top and then ask AI to make the app look closer to the screenshot.
Congrats on building your first photo app!
You can watch me test the complete app here with some photos of myself and my friends. If you followed this tutorial closely, you now know how to get AI to:
Write a spec
Build a full stack app
Hook up a real API
Now go generate some headshots of your friends and tag me on social 📸
If you want to keep building, check out the “AI tutorial” section of my YouTube channel for more easy to follow tutorials.
Peter, thanks so much for this tutorial. I recreated this today as my first project with Cursor and Claude code - it was fun and made for really great learning for me, as someone who's never coded. I also used Lovable earlier this week and so far am preferring Cursor + CC. I'm also a complete novice with Lovable, but found myself disconnected from what was happening because I couldn't really follow what it was doing. Brainstorming my next Cursor + CC project now!