

Full Tutorial: Build Self-Improving Claude Skills in 20 Min (with Eval + Memory)
Learn how to build a skill from scratch, set up evals so it checks its own work, and add memory so it improves over time

Dear subscribers,
Today, I want to show you how to build Claude Skills that catch their own mistakes and get better the more you use them.
I’ve become completely AI-skill pilled. I love encoding my knowledge and taste into skills and then reusing them to save time every week.
Watch my video now to see me build a skill from scratch in 5 steps complete with an eval loop and memory.
Timestamps:
(00:00) What an AI skill is and the 5 steps
(01:56) Step 1: Give AI your personal context and examples
(05:00) Step 2: Edit the description to trigger the skill reliably
(05:59) Step 3: Build an eval loop to have AI fix its own mistakes
(11:54) Step 4: Add memory so the skill improves itself over time
(13:40) Step 5: Build a skill editor to improve all your skills
(17:44) Where human taste still plays a role
I’m proud to partner with Linear

As teams ship faster with AI agents, the bottleneck shifts from building to deciding what to build.
Linear’s new Agent understands your full workspace context: roadmap, issues, customer requests, and code. Ask it to surface patterns across feedback, scope out a spec, or catch you up on team progress.
A quick recap of AI skills
As I shared before, a skill is just a folder with instructions that AI can trigger for a given task. In this tutorial, I’m going to build an /edit-post skill that can edit any newsletter or long-form piece. Here’s what the skill folder will look like at the end:
edit-post/
├ skill.md
├ example-tutorial.md
├ example-personal.md
├ example-product.md
├ evals.md
├ memory.md
skill.md tells AI what the skill does and when to trigger it.
The example files include my best posts so the skill can learn my writing style.
evals.md will have pass/fail checks the skill uses to grade its own output.
memory.md will log lessons from past chats so the skill gets better over time.
Now let’s build these files in 5 steps.
1. Create the skill using your examples and personal context
My newsletter has three types of posts: tutorials like this one, personal essays on career and life, and deep dives on AI trends and concepts. I saved my best posts for each type in separate md (text) files below:
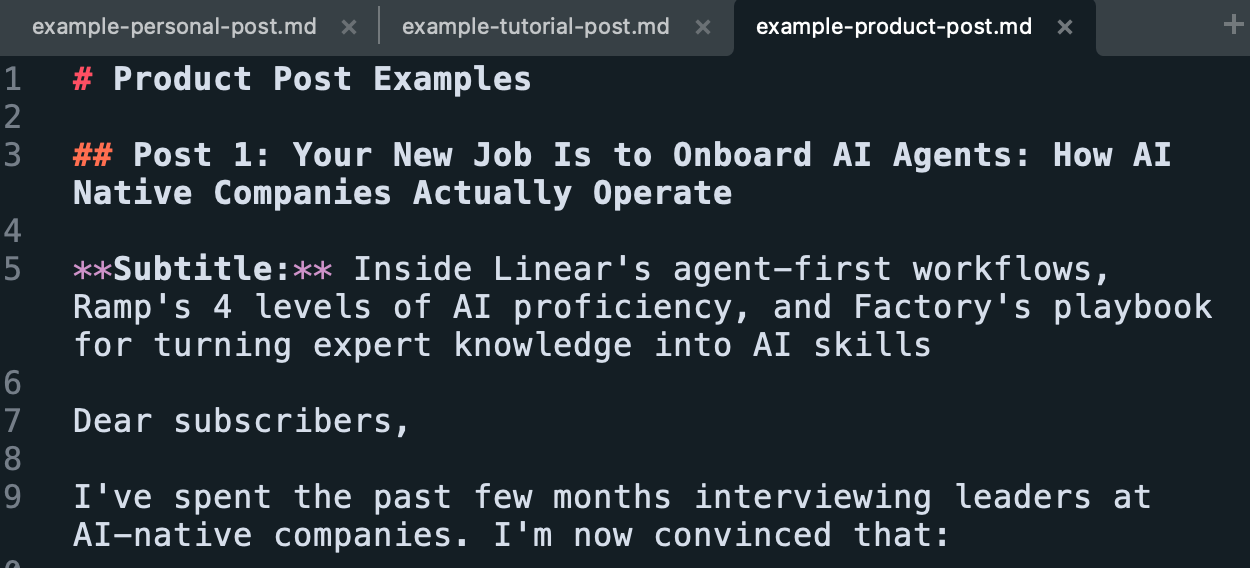
Then I gave Claude Code all three example files and this prompt:
Create an edit-post skill that helps me edit a draft newsletter or any long-form post based on these examples. Review the examples, ask me questions, and keep the skill to about one page.
The most important thing here is to give AI as much personal context and examples of good output as you can. You should also keep these context files separate from the main skill.md for two reasons:
It keeps the skill.md lean because AI can decide which example posts to load (e.g., tutorial vs. personal post) based on your draft.
It lets you share the skill more easily without revealing your personal posts or information.
2. Be explicit about when AI should trigger the skill
When you ask AI a question, it doesn’t load the whole skill by default. Instead, it only reads the name and description to decide whether to load the full skill:
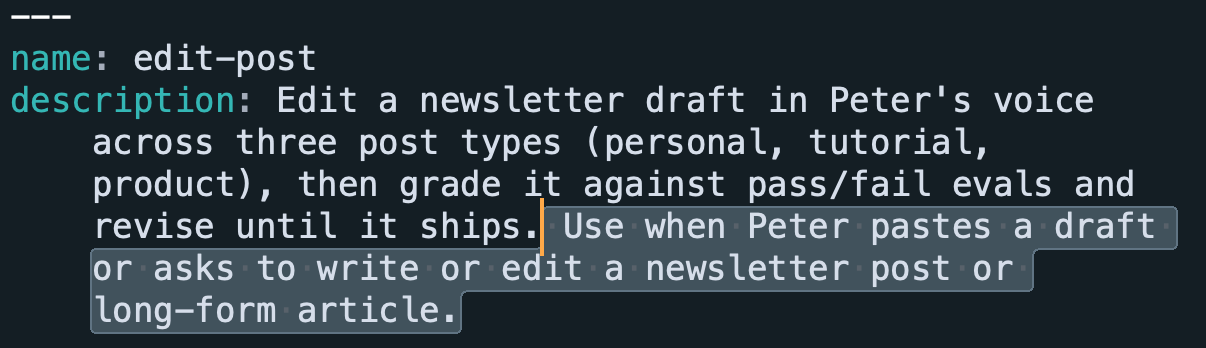
So it’s very important to include explicit “Use when…” instructions so AI knows when to trigger the skill automatically. You can always trigger it by hand too (type /edit-post).
3. Test the skill manually, then build an evals.md loop
Once you have a skill drafted, test it manually a few times.
For example, I ran /edit-post on a real draft, then gave it feedback to improve. After a few manual iterations, tell AI:
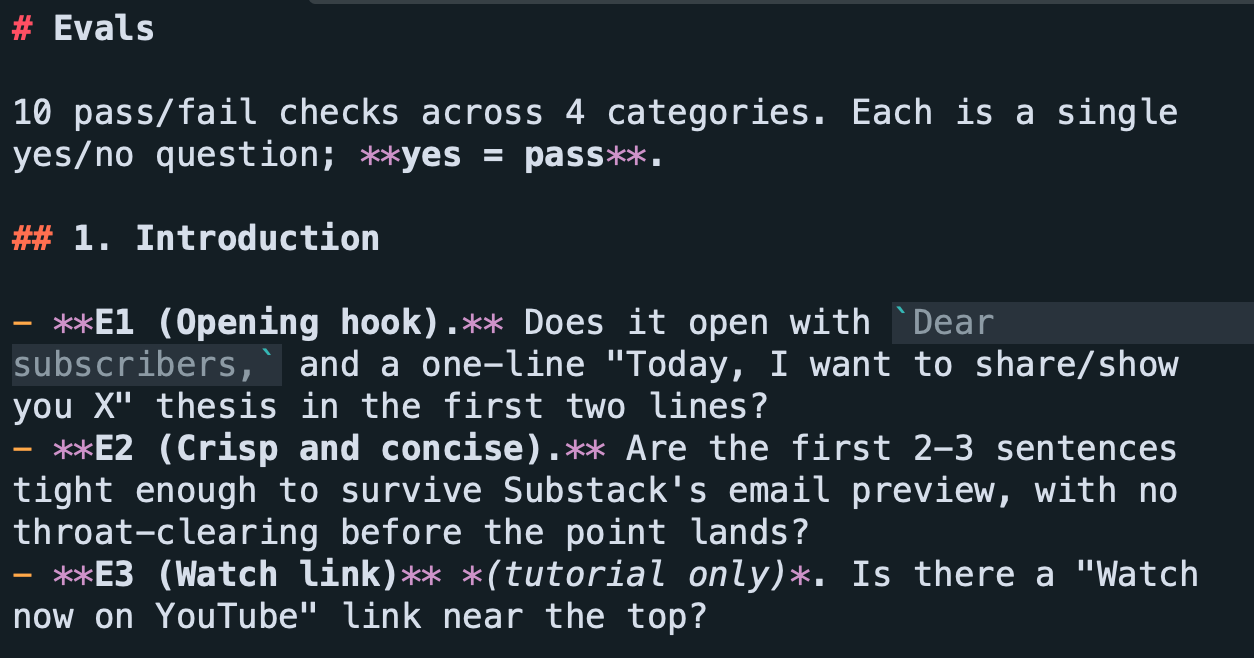
Create an eval.md with 10 pass/fail checks across these categories: Introduction (does it hook the reader?), voice (is there AI slop?), substance (is there a practical insight?), and CTA (are the next steps clear?).
An eval is just written instructions that asks the AI to check its own work. I prefer pass/fail over scoring evals (like 4/5) because AI can’t reliably tell a 3/5 from a 4/5. Here’s a snippet of the evals that it generated for me:
Before we run the evals, give AI one more prompt:
When you run the evals, spin up a separate agent with a clean context window. If any eval fails, send it back to iterate until all evals pass.
This sets up the evals loop where one agent edits the post, a second agent grades it, and because the grader has a clean context window, it isn’t biased by the first agent’s work. If anything fails, the two will keep working until everything passes:

When I ran the loop on a newsletter draft, it took five rounds between the two agents to pass all the evals. AI stripped every em dash and “X, not Y” phrase along the way.
I think setting up this evals loop makes a big difference in leveling up your skills. You can just kick it off, go get coffee, and come back to a cleaner draft. You should still review and edit the final output manually of course.
4. Give the skill a memory.md so it improves over time
Evals improve the skill’s output and memory improves the skill itself.
To set it up, ask AI:
Create a memory.md for this skill that logs our past conversations using it. Be concise and make sure it doesn't overlap with evals.md.
A memory.md is just a text file with a reverse-chronological log of what the skill learned from your past chats. Here’s an example:
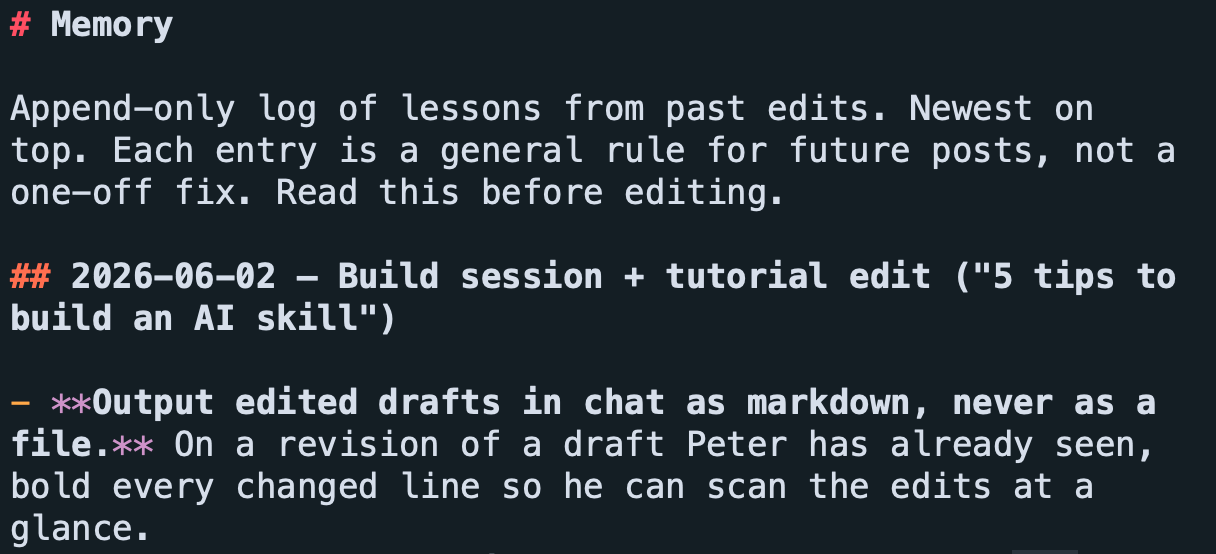
Setting this up is optional, but I’ve found it useful for feedback that doesn’t fit a clean pass/fail check, like “make the voice more authentic.” Make sure skill.md references both evals.md and memory.md.
5. Build a skill that builds skills
I’ve been skillmaxxing for days, and I do worry that relying on AI to write skills could lead to a mess of slop that drags down the model’s response quality.
That’s why I built /skill-editor and /no-ai-slop skills to make all my skills concise and strip AI slop like em dashes, “X, not Y” phrasing, and duplicate instructions. Here’s a snapshot of my /no-ai-slop skill:
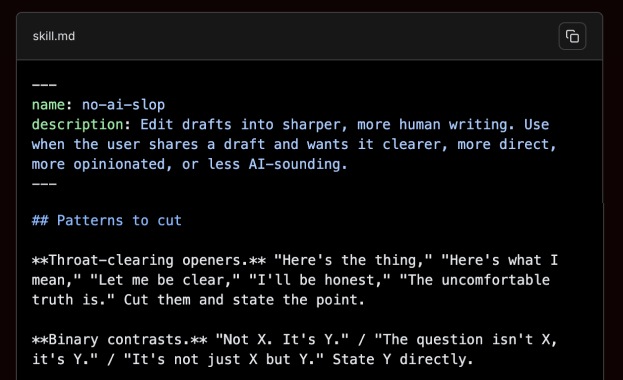
When I ran these skills on the /edit-post skill we just built, it caught a few em dashes, removed some redundant formatting, and made the skill more concise.
Quick plug: I’ve made this full post free, but if you want to copy my /skill-editor and /no-ai-slop skills, along with a dozen other handcrafted skills, consider becoming a paid subscriber to unlock all my skills and prompts at behindthecraft.com.

Follow these 5 steps to build skills that improve themselves
Here’s how you put this guide into practice. First, reflect on your past week and brainstorm with AI workflows that you can streamline with skills. Then create each skill by following these 5 steps:
Give AI your personal context and best-in-class examples to draft the skill.
Trigger the skill reliably by including “use when XYZ” in the description.
Build an evals.md with pass/fail checks so AI can loop to improve its own output.
Add a memory.md with lessons from your chats so the skill improves over time.
Build (or copy) a /skill-editor skill to keep all your skills clean and concise.
Watch the video now and subscribe to my channel if you enjoyed this tutorial. Let me know if you have any questions in the comments!
Thanks for the post, very detailed and practical. I am getting in the weeds of creating skills (agents never felt natural to me) and this is a very methodic way. Let’s see how it works out.
This is a great article. I will watch the episode ASAP. Thank you for all the effort on this